
You have a nice big beautiful photo. It is gorgeous. But you need it much, much smaller, and by the time the file is down to the right size, you might find that the image has started to take on a blurry look. This is a real problem with resizing images, but luckily in Photoshop there's a very simple solution.
This tip will only work with Photoshop CS and CS2. If you don't have a CS version yet I recommend you try and get one as soon as you can, because they are full of powerful new features. For earlier versions of Photoshop there's a workaround at the end of this tip.
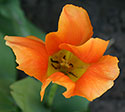
When you want to reduce an image go to the Image> Image Size menu. Click onResample Image and choose Bicubic Sharper from the drop-down menu. This is the best setting for making sure that an image doesn't blur. The example photo of the flower started at 2,000 pixels across. I stepped it down to 250, and then again to 125 with almost no loss of sharpness. For enlarging an image select Bicubic Smoother.
 I found this to be such an effective trick that I wished it had been the default setting in Photoshop for the Image Size menu from the start. Then I discovered I could set it as the default myself. All you need to do is go to Preferences> General and you'll see Image Interpolation and there you can pick Bicubic Sharper from the choices.
Another thing to keep in mind when resizing is to try to do it only once on an image. Many people will resize repeatedly as they search for the perfect fit for a design element, and then end up with an image with a lot of blur. It's always better to experiment on a duplicate of the image. Then, when you've settled on the final dimensions, you can go back to the original and resize it just once.
Pre-CS Workaround
In earlier versions of Photoshop simply zoom out so that your window and image are at either 50% or 25%, and then take a screenshot of the image window at this new reduced size. You'll find that the image will maintain its sharpness. Now open the screenshot in Photoshop, and crop and save. The trick to making this work is to use either a 50%, 25%, or 12.5% view size before making the capture. If you view the image at 66.7%, 33.3%, or 16.7%, the image will not be as sharp due to the way Photoshop draws images at those sizes.
Troubleshooting
Never resize a GIF image. First change the mode to RGB Color (Image> Mode> RGB Color), and then resize. You can still save your resized image as a GIF, just do not apply resizing while the image is in the GIF mode.
This tip will only work with Photoshop CS and CS2. If you don't have a CS version yet I recommend you try and get one as soon as you can, because they are full of powerful new features. For earlier versions of Photoshop there's a workaround at the end of this tip.
When you want to reduce an image go to the Image> Image Size menu. Click onResample Image and choose Bicubic Sharper from the drop-down menu. This is the best setting for making sure that an image doesn't blur. The example photo of the flower started at 2,000 pixels across. I stepped it down to 250, and then again to 125 with almost no loss of sharpness. For enlarging an image select Bicubic Smoother.
I found this to be such an effective trick that I wished it had been the default setting in Photoshop for the Image Size menu from the start. Then I discovered I could set it as the default myself. All you need to do is go to Preferences> General and you'll see Image Interpolation and there you can pick Bicubic Sharper from the choices.Another thing to keep in mind when resizing is to try to do it only once on an image. Many people will resize repeatedly as they search for the perfect fit for a design element, and then end up with an image with a lot of blur. It's always better to experiment on a duplicate of the image. Then, when you've settled on the final dimensions, you can go back to the original and resize it just once.
Pre-CS Workaround
In earlier versions of Photoshop simply zoom out so that your window and image are at either 50% or 25%, and then take a screenshot of the image window at this new reduced size. You'll find that the image will maintain its sharpness. Now open the screenshot in Photoshop, and crop and save. The trick to making this work is to use either a 50%, 25%, or 12.5% view size before making the capture. If you view the image at 66.7%, 33.3%, or 16.7%, the image will not be as sharp due to the way Photoshop draws images at those sizes.
Troubleshooting
Never resize a GIF image. First change the mode to RGB Color (Image> Mode> RGB Color), and then resize. You can still save your resized image as a GIF, just do not apply resizing while the image is in the GIF mode.
Comments
Post a Comment